


Candy cane nails have a reputation problem — and Christmas 2026 is the year to fix it.
Somewhere along the way, the candy cane became the kids’-table design: chunky red stripes, googly proportions, zero elegance. Meanwhile, the fashion versions sitting on every styled nail board are something else entirely — thin asymmetric stripes, unexpected color pairs, stripes so fine they read pattern instead of costume.
The difference is not talent. It is stripe engineering — where the stripe sits, how thin it runs, and which technique builds it. Tape-built stripes read sharp. Freehand curves read organic. The swirl reads sculptural. Same candy cane energy, four completely different sophistication levels.
So this guide runs like a stripe school — candy cane nail art organized by how the stripe is actually built, from the foolproof tape method to the hand-painted cane charm. Eight designs, the color pairs that keep them grown-up, and the two rules that separate chic from children’s party forever.
The stripe is calling. It can read elegant.
Follow our Pinterest boards for daily nail inspiration, and join us on Facebook so you never miss a seasonal design guide.
The Two Rules That Keep Candy Cane Grown-Up
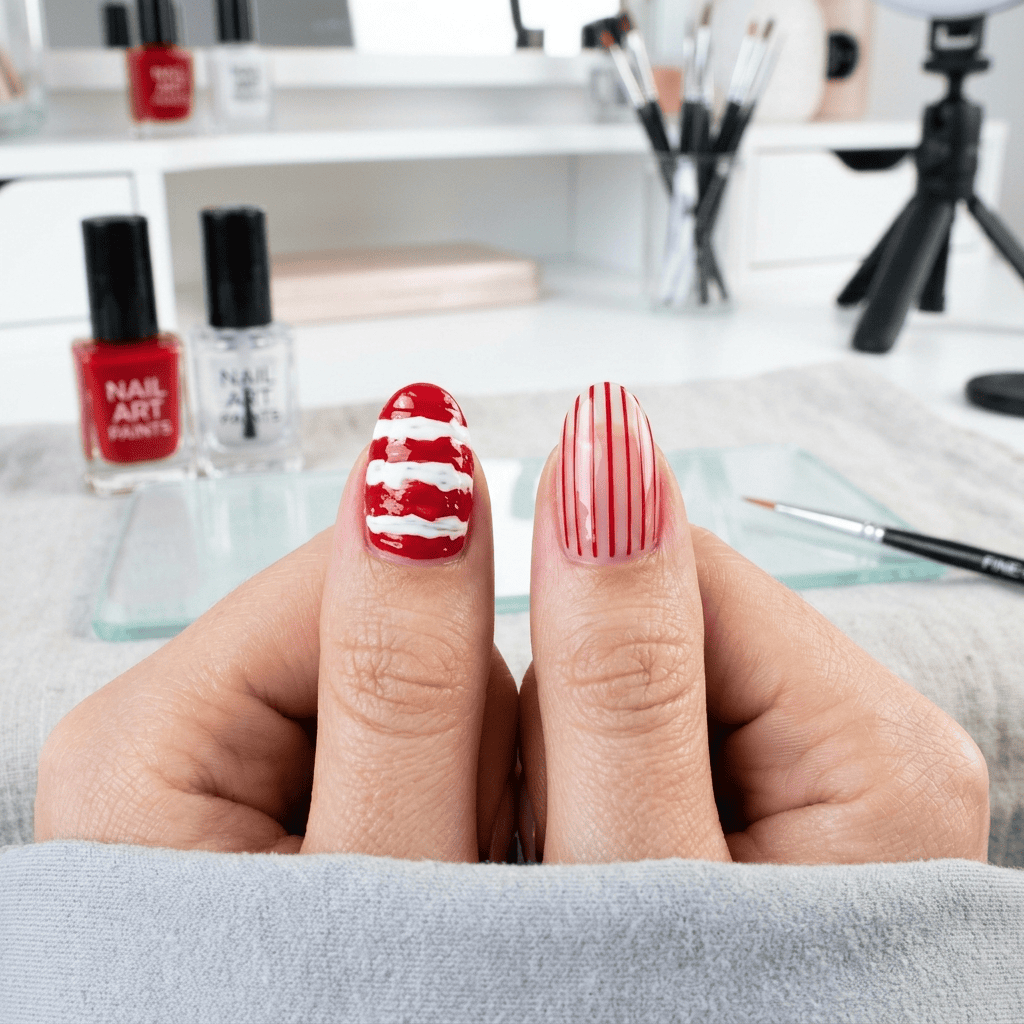
Before the schools, the philosophy — because these two rules do all the work.
Rule one: thin stripes beat thick ones. The childish version paints three fat stripes across a tiny nail. The chic version runs two or three fine lines with air between them — pattern reads instead of candy-costume. Thin lines with breathing room is the entire sophistication secret.
Rule two: unexpected colors beat expected ones. Red and white is the childhood version. The grown-up pairs — plum and gold stripes, chocolate and cream, navy and silver — keep the stripe energy while losing the costume. The shade logic runs from our nail polish colors guide: keep the stripes, swap the temperature.
Everything below obeys both rules. Now the schools — by how the stripe gets built.
School 1: The Tape Method (Foolproof Straight Stripes)
The beginner-proof technique — striping tape builds ruler-straight lines that freehand never manages.
1. The Classic Diagonal Candy Cane

The icon, done properly: a nude or sheer base, then two to three thin diagonal red stripes sweeping corner to corner — the candy cane angle, but fine-lined.
The tape build: lay striping tape at the diagonal, paint the line, peel while wet, repeat for each stripe. The tape guarantees the crisp edges that freehand wobbles away from — and the thin lines keep the whole nail reading boutique instead of kindergarten.
The grown-up color swap: plum stripes on a cream base, or navy on sheer — the same geometry, the sophisticated palette. The plum version links directly to the season’s it-shade from our christmas plum nail trend 2026 report.
2. The Stripe French

The candy cane stripe moved to the tips only — a french manicure whose tip band is striped red and white, or gold and plum.
The build: paint the french tip freehand or with the guide method from our french tip nail ideas 2026 guide, then lay one tape line through the tip’s center before the second color. The result: a tip that reads candy from a distance and couture up close.
Why it wins the office: stripes confined to the tip keep the nail 90% neutral — the design that survives Monday and steals the party Friday.
3. The Half-Nail Stripe Block
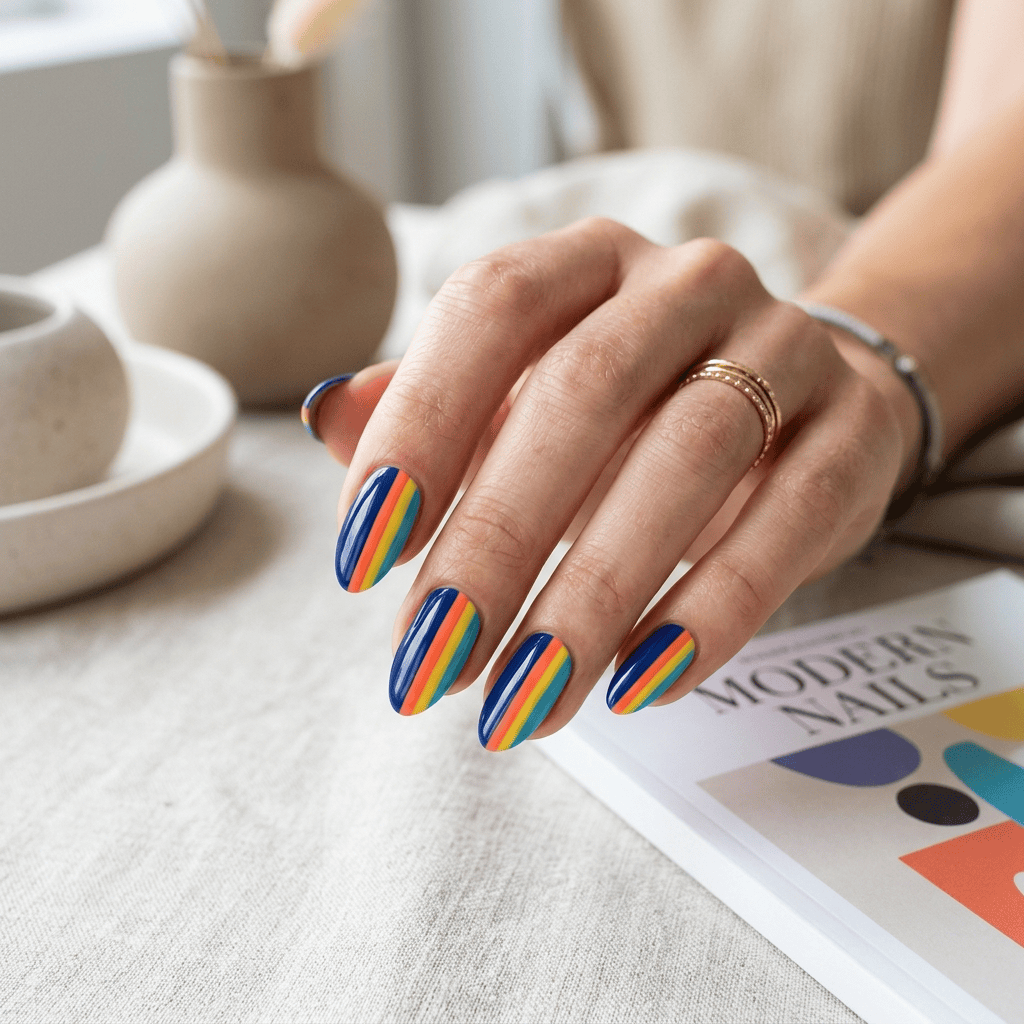
Stripes filling only half the nail — vertical or diagonal — with the other half solid. The color-blocked version that reads modern and editorial.
The build: tape off half the nail, stripe the exposed section, peel. The clean divide between striped half and solid half is what makes this look designed rather than doodled.
School 2: The Freehand School (Wavy, Organic Stripes)
The brush-and-courage tier — where stripes bend, curve, and read hand-painted on purpose.
4. The Vertical Barber Pole
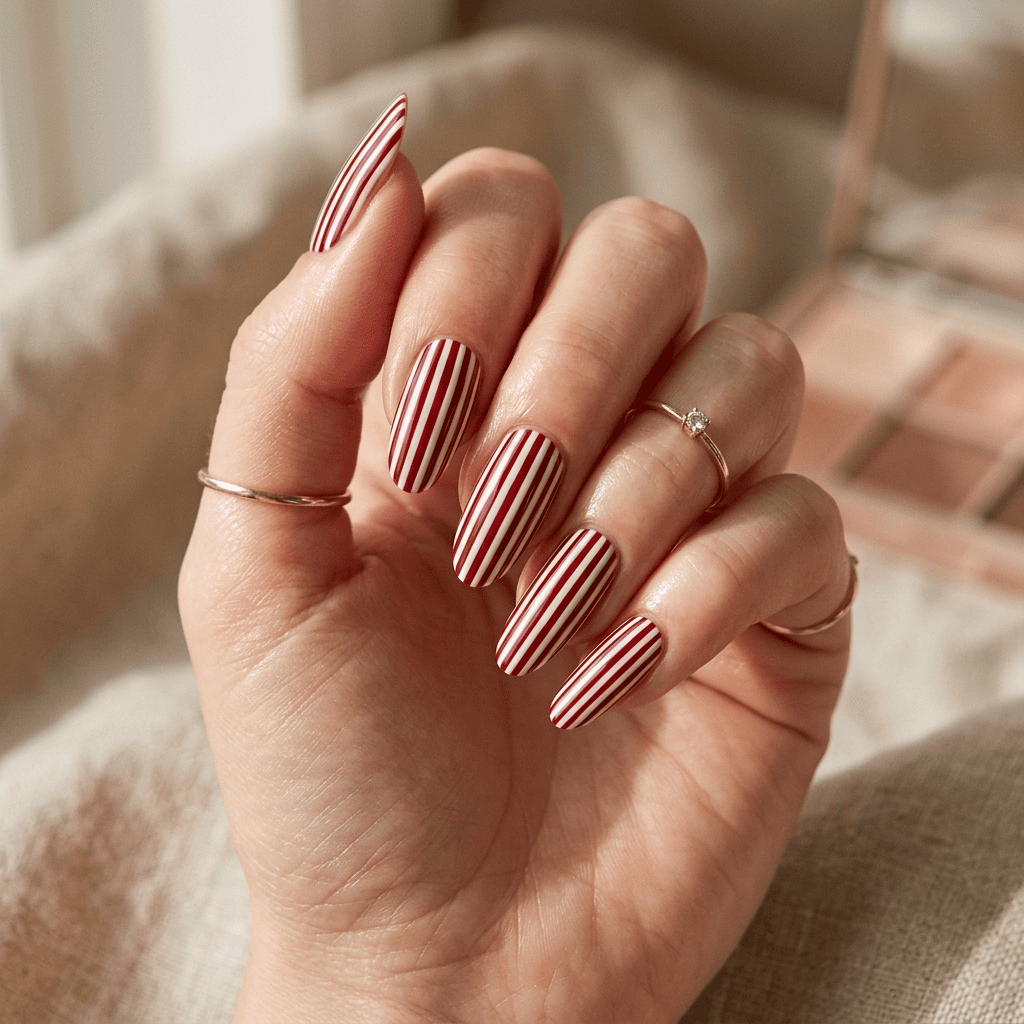
Fine vertical stripes running cuticle to tip — the barber-pole effect that elongates every nail. Three thin lines per nail, alternating colors, with the stripes slightly curving to follow the nail’s natural width.
The freehand trick: rotate the finger instead of moving the brush — the same turn-not-drag technique from our easy halloween nails at home guide. Steady table, moving finger, one continuous stroke per line.
The elongation note: vertical stripes stretch short nails visually — this is the candy cane build for shorter lengths, where the pattern from our short nail designs 2026 guide’s proportion rules keeps everything scaled right.
5. The Curved Ribbon Stripe
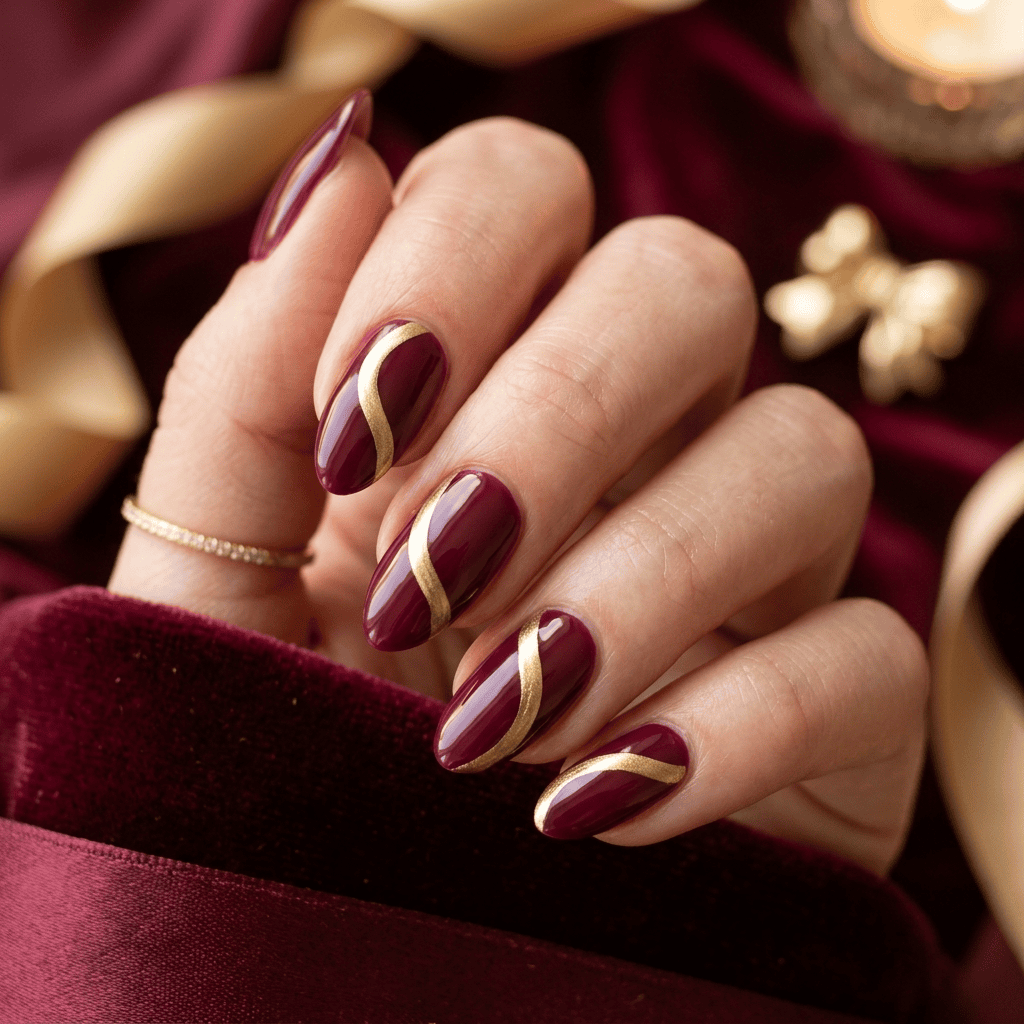
The stripe that bends — one wider curved band sweeping across a solid nail, reading like a ribbon laid across the manicure.
The build: one stroke of the striping brush in a single S-curve, slightly thicker than the tape lines. The curve’s softness is what separates this from geometric tape stripes — organic where tape is architectural.
The color story: a gold ribbon-curve on burgundy, or cream on forest — the ribbon reads gift-wrapped, which is the whole Christmas point.
6. The Wavy Peppermint Pair
Two wavy lines in alternating direction — the loose peppermint swirl suggestion without any actual swirl work. The lines wave opposite ways on neighboring nails, creating pattern through contrast.
The forgiveness factor: wavy lines are supposed to wobble. The freehand school’s biggest gift — the imperfection reads handmade, and handmade reads expensive.
School 3: The Swirl School (The Actual Cane Shape)
The tier where the candy cane shape itself appears — curved, dimensional, unmistakable.
7. The Hand-Painted Mini Cane
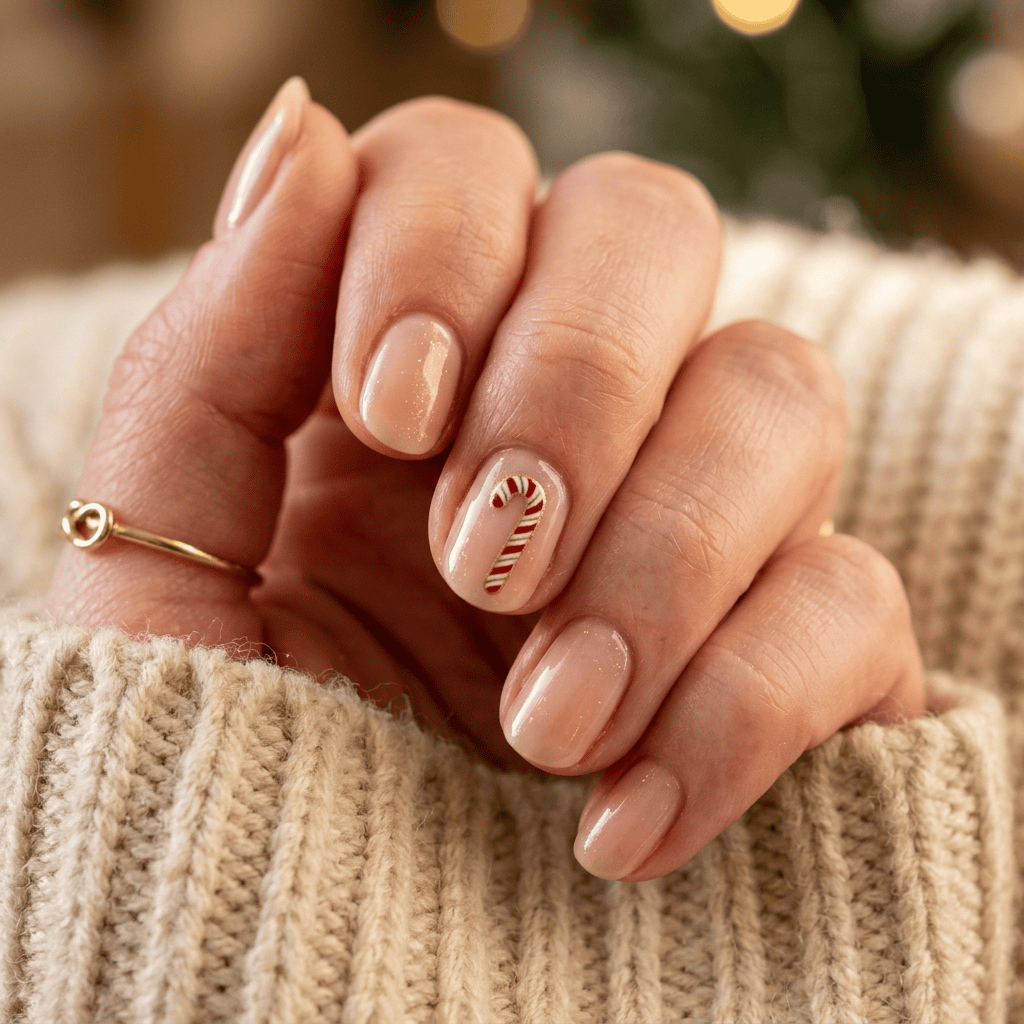
The actual candy cane shape — a tiny hook-top cane painted with fine stripes on one accent nail. A J-shaped line in white over red, striped with even finer red lines through the white.
The build: paint the J in white first, then run thin red stripes through it while wet — the stripes follow the curve. A toothpick from the dotting kit handles the whole miniature. The same toothpick logic from our dot designs, promoted to line work.
8. The 3D Cane Charm

The sculptural option — a tiny premade acrylic or resin candy cane charm glued onto one accent nail, sealed under a thick topcoat.
The no-skill argument: the charm does everything. Paint all nails a solid holiday shade, press one cane charm onto each accent nail, and the design is done in five minutes — the charm route for everyone who loves the motif and hates the line work.
The placement rule: charms sit center-nail, never near the edge — edge placement catches on everything and the charm pops off by dessert.
School 4: The Accent Strategy (One Stripe, Big Statement)
The minimalist’s candy cane — the stripe as a detail rather than a theme.
9. The Single Stripe Accent
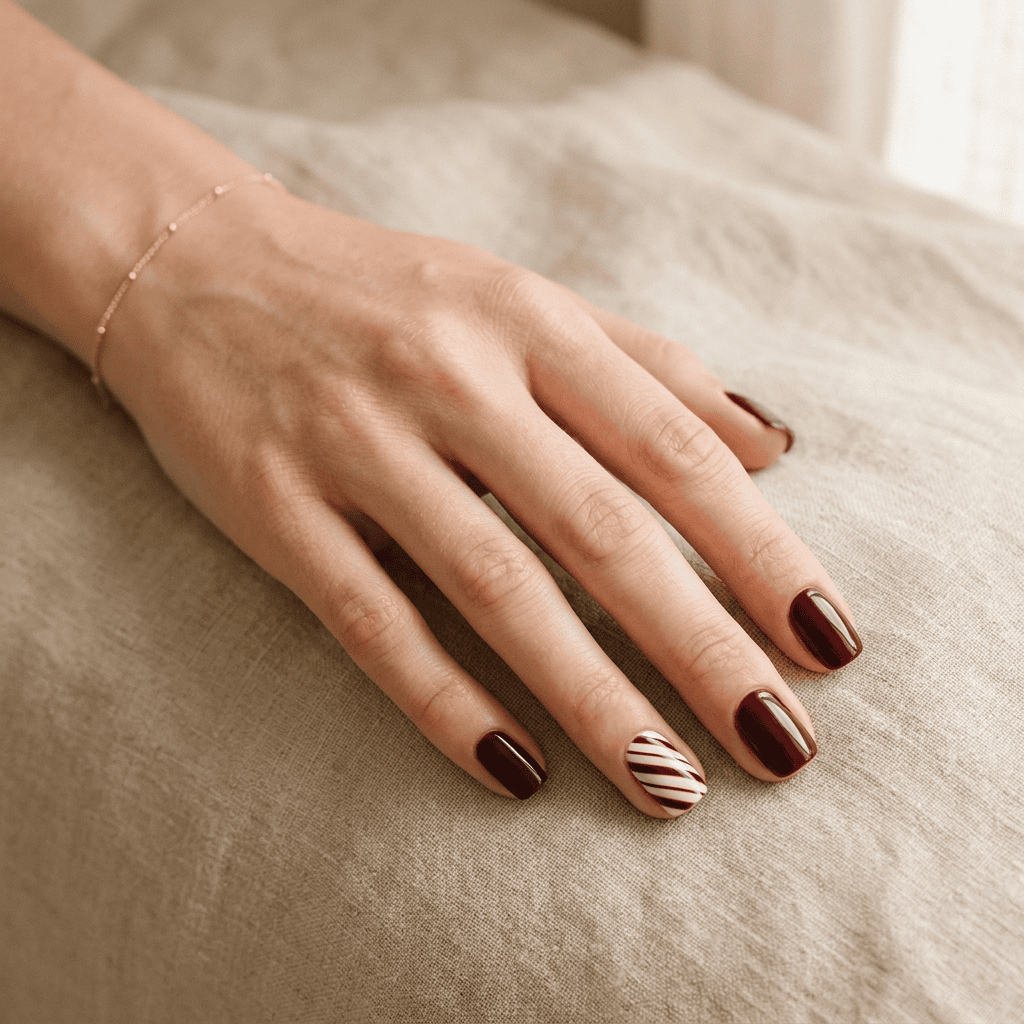
Solid nails in one deep holiday shade with a single thin candy-cane stripe on one accent nail per hand. One diagonal, two colors, complete theme.
The restraint payoff: the single stripe reads like a signature rather than a costume — the same one-accent discipline from every great minimal manicure, with December’s motif as the accent.
10. The Full Peppermint Set
The committed build — every nail striped, alternating direction and scale, red and white in the classic pairing done at grown-up fineness. Ten nails, full pattern, maximum holiday.
The commitment note: this is the set for the person who waits all year for candy cane season — and at thin-stripe fineness, it reads festive rather than five years old. The full collection beside it lives in our Christmas nails 2026 guide.
The Color Pairs Beyond Red and White

The grown-up palette — four stripe pairs that keep the pattern and lose the costume.
Plum and gold — the luxury candy cane. Purple stripes with metallic gold between them, straight from the season’s it-shade report.
Chocolate and cream — the cozy candy cane. Brown stripes over cream reads gingerbread-adjacent and warms every winter outfit.
Navy and silver — the frost candy cane. Cool stripes that pair with everything silver in the December wardrobe.
Forest and champagne — the elegant candy cane. Deep green lines with champagne between — the pairing that reads boutique-wrapped.
Every pair uses the same stripe schools above — the geometry never changes, only the temperature does. The full seasonal shade map lives in our fall nail colors guide.
The Mistakes That Make Stripes Read Cheap
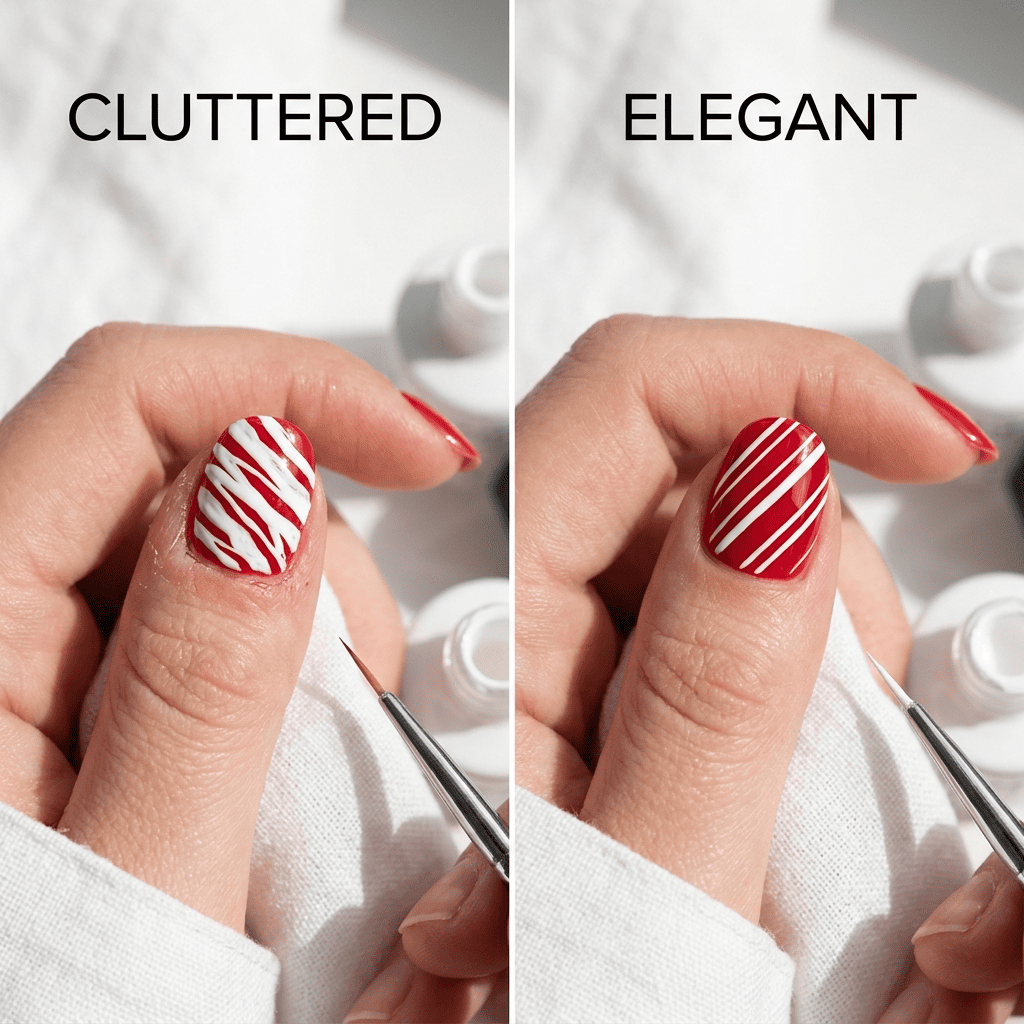
Three errors, three one-line fixes.
The fat stripe. Three thick lines on a small nail read candy costume. Halve every stripe width you planned — thin is the entire grown-up trick.
The no-air pattern. Stripes touching each other read zebra, not candy cane. Air between lines is what keeps the pattern readable.
The topcoat skip. Tape-built stripes have raised edges — one thick topcoat layer buries them smooth, and skipping it is why tape designs chip at the line within days. Seal flat or the pattern peels flat off.
And for the marathon version — stripes in gel hold their crisp lines for three weeks — the system lives in our gel nail designs 2026 guide, with removal in our how to remove gel polish guide keeping January’s nails intact.
Candy Cane Nails FAQ
How do you paint candy cane stripes on nails?
The tape method builds the straightest lines — lay striping tape at the candy-cane angle, paint over it, peel while wet. Freehand stripes need the rotate-the-finger trick: steady hand, moving finger, one continuous stroke. Both methods appear throughout this guide’s four stripe schools.
Are candy cane nails too childish for adults?
Not when built right — the childish version is fat stripes with no air between them. The grown-up version runs two or three thin lines with breathing room, often in unexpected colors like plum-gold or chocolate-cream. The pattern stays; the costume leaves.
What colors work for candy cane nails besides red and white?
Plum and gold, chocolate and cream, navy and silver, and forest with champagne — all four pairs keep the stripe geometry while reading sophisticated. The seasonal it-shades from plum and chocolate reports both work as stripe colors this December.
Do candy cane stripes work on short nails?
Yes — with the vertical barber-pole build, which elongates short nails visually, and scaled-down stripe widths. The proportion rule is constant: shorter nails need thinner lines with more air between them, never shrunken fat stripes.
How long do candy cane nail designs last?
Regular polish holds seven to ten days with capped edges and a thick smoothing topcoat — the topcoat matters double here because tape stripes have raised edges. Gel versions hold crisp stripes two to three weeks, covering the whole holiday in one set.
More questions? Ask us on Facebook and we will match a stripe school to your hand steadiness and your holiday palette.

The Stripe Grew Up
Four schools, eight designs, and the two rules that keep the season’s most misunderstood motif elegant — candy cane nails stop being childish the moment the stripes get engineered.
Pick your school tonight — tape if you want foolproof, freehand if you want organic, the swirl if you want the shape, the accent if you want restraint. Thin the lines, add the air, seal it well — and the childhood stripe shows up at the adult table looking like it belongs.
Save this school to our Pinterest boards so it is on your phone when you paint, and complete the December shelf with the christmas ombre nails gradients, the velvet nails finish, and the full Christmas nails 2026 collection.
New stripe guides every week this season. Stay thin-lined, stay merry!