
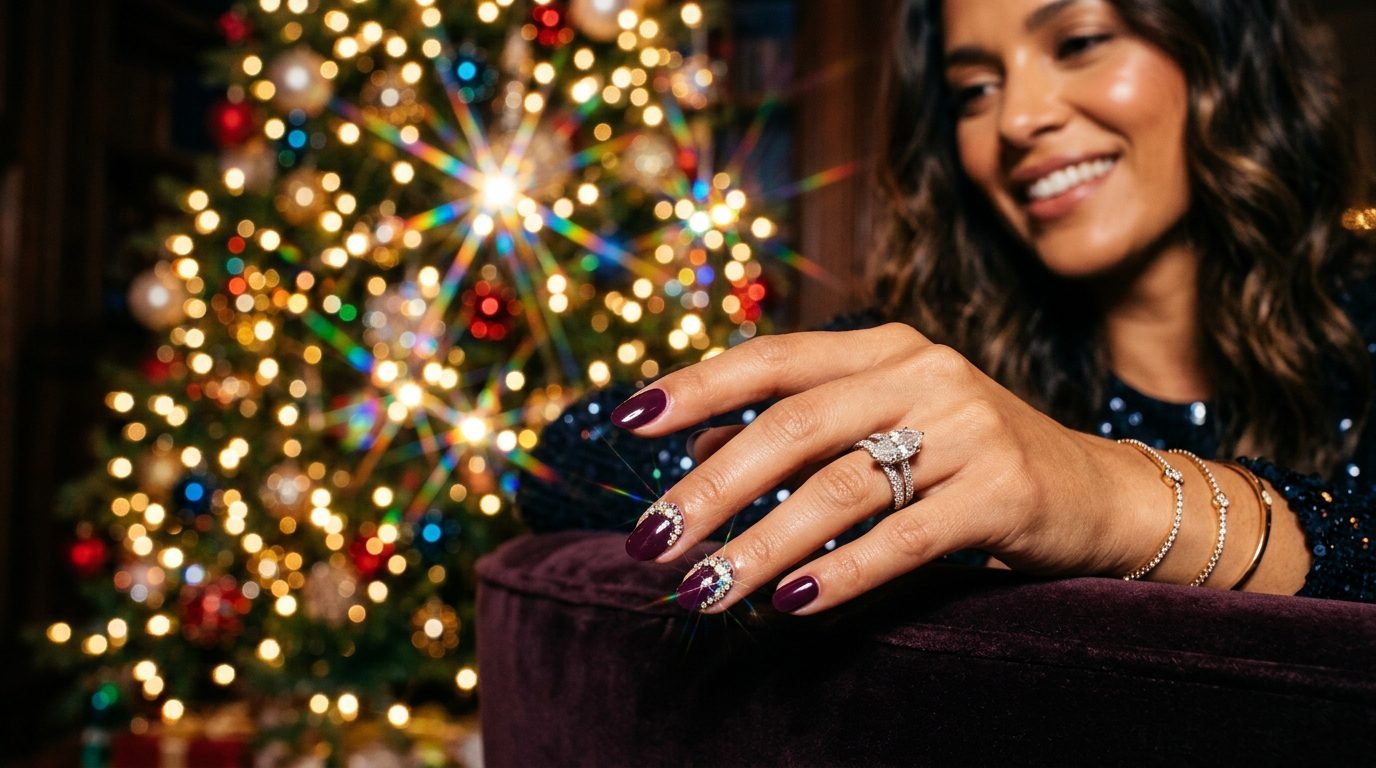

Christmas rhinestone nails win every December argument about sparkle — because they settle it physically.
Glitter reflects light. Chrome mirrors it. But a rhinestone is a real object — a tiny crystal with actual depth, catching light from every facet at once. Beside the Christmas tree, a rhinestone nail does not suggest shine; it produces it, the way real jewelry does.
The problem with rhinestone nails has never been the stones. It is the placement — the scattered-everywhere approach that reads craft project instead of couture. One gem placed with intention reads jewelry. Twenty gems scattered randomly read party store.
So this guide is built around the only thing that matters in rhinestone work: placement. Five placement zones — the corner gem, the crystal line, the cluster, the single stone, and the full mosaic — each with the designs it creates, the glue rules that keep gems attached through the whole season, and the size guide that decides everything.
The stones are the easy part. The map is the art.
Follow our Pinterest boards for daily nail inspiration, and join us on Facebook so you never miss a seasonal design guide.
Why Rhinestones Belong at Christmas (The Real-Jewelry Effect)

Three reasons December is rhinestone season’s true peak.
The light sources multiply. Tree lights, candles, fireplace glow, camera flash — the rhinestone’s facets respond to all of them simultaneously, refracting different colors from different angles. Glitter gives one effect; a crystal gives a light show.
The outfit connection is literal. December is jewelry season — the real necklaces, the real earrings — and rhinestone nails are the manicure that participates. The hands beside real gemstone jewelry look coordinated; the hands beside it in flat polish look unfinished.
They photograph as depth. Every other finish paints shine onto a flat nail. A rhinestone casts its own tiny shadow, catches its own highlights, and reads three-dimensional in every photo — the depth that makes close-up detail shots look professionally styled.
The Glue Rules (Before a Single Gem Goes On)

The section that decides whether gems survive the season or float away by dessert.
Rule one: gel or nail glue, never topcoat. Gems pressed onto wet topcoat pop off within days — topcoat is a finish, not an adhesive. Nail glue or uncured gel is the only bond that survives December.
Rule two: the placement is permanent — plan on a palette first. Arrange the gems on a bare nail or practice wheel before touching glue. Rhinestones forgive repositioning before attachment only.
Rule three: seal the edges, never the tops. A thin gel topcoat brushed around each gem’s base locks the edges — coating the crystal’s face dulls the sparkle that justified the gem. Seal around, keep the face free.
Rule four: the size hierarchy stays honest. One large gem or several small ones per zone — mixing three sizes in one cluster reads chaotic. The size discipline is what separates jewelry from confetti.
Placement 1: The Corner Gem — The Single Statement

One crystal placed at one corner of each accent nail — the smallest rhinestone investment with the largest effect.
The look: solid plum, burgundy, or forest nails with a single 2mm crystal at the outer corner of each accent nail. One gem, one corner, deliberate placement — the rhinestone as punctuation rather than decoration.
Why the corner works: the nail’s outer corner catches light during every hand gesture — the corner gem flashes with each movement, reading like a tiny catchlight. The single-stone discipline pairs with the minimal energy in our old money nails guide.
The pairing: this placement beside the deep plum from our christmas plum nail trend 2026 report is the season’s elegant quiet — one gem, one shade, endless polish.
Placement 2: The Crystal Line — Structure in Stones

Gems set in a straight line — down the nail’s center, along the cuticle, or tracing the tip. The rhinestone as architecture.
The center line: tiny crystals running cuticle to tip down each accent nail — the spine of light that reads editorial and elongates the nail visually.
The cuticle crescent: gems arcing along the cuticle line — the reverse-french in crystals, the placement that frames the nail’s base with light.
The tip line: crystals tracing the free edge — the rhinestone French, the tip outlined in stones instead of polish. The tip line catches light with every gesture and survives the season beautifully because the line has no large surface to snag.
The line discipline: same size gems, equal spacing — the straight-line placements live on measurement, and uneven gaps are the error that reads DIY accident instead of design.
Placement 3: The Cluster — Thejeweled Moment

Three to five gems gathered in one zone — the cluster that reads like a brooch pinned to the nail.
The crescent cluster: five gems in descending sizes arcing at one corner — the crescent-moon cluster that reads celestial and elegant.
The flower cluster: five stones arranged in a circle with one center gem — the rhinestone flower on a solid accent nail, the design that reads vintage-jewelry rather than nail art.
The accent positioning: one cluster per hand, on the ring finger — the single brooch moment. Two clusters per hand max; three reads scattered. The same restraint logic from every accent discussion in our Christmas nails 2026 collection.
The base under the cluster: clusters sit best on solid deep shades — plum, burgundy, forest — where the gems’ sparkle contrasts hardest. On pale bases, white and pearl gems cluster; on dark, gold and crystal.
Placement 4: The Single Stone — The Minimalist’s Rhinestone

One gem. One nail. The whole statement.
The look: nine bare or solid nails, one single crystal centered on one accent nail — the rhinestone as a solitaire. The design for the person who wants the trend without the theme.
The size upgrade: because the stone stands alone, it can be large — a 4mm or 5mm crystal reads as a statement jewel rather than a decoration. The single large stone is the rhinestone world’s engagement ring.
The pairing: this placement beside the glazed finishes from our christmas chrome nail ideas guide — one chrome nail, one solitaire nail, seven solid — the full quiet-luxury set.
Placement 5: The Full Mosaic — The Committed Build

Gems covering the entire accent nail — the mosaic that reads like the nail itself is jeweled.
The build: gems in graduated sizes filling the nail surface — larger stones at the center, smaller filling gaps, the mosaic logic that reads dense rather than scattered. A full-mosaic accent nail takes thirty to forty-five minutes and uses sixty to a hundred stones.
The background decision: mosaic reads best over a matching base color — gems on a base the same shade as themselves look continuous; gems on contrasting base read separate. Match the base to the gem family.
The occasion: the mosaic is the New Year’s Eve build — the one-night statement that photographs spectacularly and justifies its hour of placement. For the season-long wear, the smaller placements age better.
The Rhinestone Size Guide — The Decision That Changes Everything

Gem sizes run from 1mm to 6mm — and the size map prevents every beginner error.
1mm–1.5mm: the detail stones — used for lines, crescents, and filling. Too small to read alone; essential in groups.
2mm–3mm: the workhorse sizes — corner gems, cluster centers, the placements that read clearly without overwhelming. Most designs in this guide live here.
4mm–5mm: the statement stones — the single-solitaire placement’s territory. Too large for clusters; perfect alone.
The mixed rule: when combining sizes, go large-to-small in one direction — large center, smaller surround. The gradient sizing reads intentional; random sizing reads accidental.
The shape note: round crystals are the classic; also worth knowing — the marquise and teardrop shapes for the cluster centers, and the square gems for the architectural line placements. Shape variety within one size family reads designed.
The Survival Guide — Making Gems Last the Season

The placement is done; the survival plan keeps it through every event.
The glove rule doubles here. Dishes, shopping bags, coat pockets — rhinestones catch on everything, and December gloves protect both the manicure and the gems. The host exception: gloves off for serving, back on for the cleanup.
The hair warning. Long-haired rhinestone wearers know the truth — gems grab hair strands all day. The placement fix: gems sit closer to the nail’s center than its edges, where hair-snagging happens least.
The repair kit: a tiny nail glue and two spare gems in the bag — the two-minute roadside fix that saves the set between events. Gems that pop get repositioned, not mourned.
The removal honesty: rhinestones lift with the soak method — the process in our how to remove gel polish guide handles glue-set gems, and the natural nail needs one oil-and-recovery night before January’s designs.
The Rhinestone Color and Cut Guide

Beyond clear crystal — the gem variants that change the design’s mood.
Clear crystal — the classic. Reads like diamond, pairs with everything, photographs brightest.
Gold and champagne gems — the warm family beside the burgundy and chocolate bases from our christmas chocolate nail color report — the pairing that reads inherited jewelry.
AB crystals (aurora borealis) — the iridescent coating that shifts color with the light — one gem showing rainbow flashes. The AB finish is the rhinestone answer to the holographic trend.
Pearl half-spheres — the soft option. Pearls beside crystals in the same cluster read vintage-luxurious, and the pearl-and-crystal mix is the pairing that reads inherited rather than applied.
Christmas Rhinestone Nails FAQ
How do I get rhinestones to stay on my nails?
Nail glue or uncured gel — never wet topcoat, which pops gems off within days. Plan the placement on a palette first, press into the adhesive, and seal around each gem’s edges with thin gel topcoat while keeping the crystal face free. Glue-set gems survive the whole season.
Where should rhinestones be placed on nails?
Five placement zones, by effect: corner gems for single-statement polish, lines for architecture, clusters for the brooch moment, a single solitaire stone for minimalism, and the full mosaic for New Year’s Eve. Placement is the design — scattered gems read craft, mapped gems read jewelry.
What size rhinestones for nails?
2mm to 3mm for most placements — corner gems and cluster work. 1mm for detail lines and filling, and 4mm to 5mm reserved for the single-solitaire statement. When mixing sizes, gradient from large center to small surround — random sizing reads accidental.
Do rhinestones ruin your natural nails?
The gems do not; the removal can. Soak-based removal — the same process as gel — lifts glue-set gems safely, while picking or forcing them peels nail layers. The oil-and-recovery night after removal restores the natural nail before the next set.
What nail color looks best under rhinestones?
Deep shades contrast the sparkle hardest — plum, burgundy, forest, and chocolate bases make clear and gold gems flash brightest. Matching bases make mosaic builds read continuous, and pale bases suit pearl and white gem clusters.
More questions? Ask us on Facebook and we will map gems to your design and your December calendar.

The Map Was the Sparkle
Five placements, one glue discipline, and the size guide that changes everything — christmas rhinestone nails stop reading craft-project the moment the gems get a map.
Plan the placement on a palette tonight. Glue with intention. Seal the edges. And December’s every flash — tree, candle, camera — finds a facet waiting for it.
Save this map to our Pinterest boards so it is on your phone while you place, and complete the sparkle season with the christmas chrome nail ideas guide for the painted shine and the Christmas nails 2026 collection for everything else.
New placement guides every week this season. Stay jeweled, stay merry!